Tuesday, August 17, 2010

Vertical Smoker


A Vertical Smoker is also known as a Hollow Smoker or SmokeBox.  It is very similar in design to a Bullet BBQ Smoker, but it usually has a much bigger grill area and can hold more meats.  These come in the same basic designs as does the Bullet BBQ Smoker.  Vertical Smokers come in a large array of sizes, from small ones like the Bullet BBQ smoker to ones that are taller than an average sized person and can hold hundreds of pounds of meat.  Many of these models also come with hanging meat hooks, so you can actually hang the meat instead of putting in on a grill.  Water pans help keep the meat moist, and can be accessed through the firebox, although some models don't have separate doors for the food and the fuel.

Tomorrow, we will be looking at what the big boy's use at the BBQ Competitions and Cookoffs, and smokers that can cost upwards of $3,000!  Hey, no one ever said  professional smoking was cheap!  Sometimes ya gotta "Go Big or Go Home!", but there are competitions still won with bullet BBQ smokers and less expensive models also. So if you just keeled over because you had an itchin' to try your hand at the pro ranks of barbecue, pick yourself up off the floor!  You don't necessarily need to but an expensive, fancy smoker.  In fact, some people actually build their own, but that is a topic for another day. Check out the rest of my All Things Barbecue Blog

Here are some of my favorite Vertical BBQ Smoker models:

Landmann 3405CLA Two Drawer-Heat Saving "Smoky Mountain" Charcoal Smoker, 524-Square Inch, Black Landmann 3405CLA Two Drawer-Heat Saving "Smoky Mountain" Charcoal Smoker, 524-Square Inch, Black
Vertical Charcoal Smoker with two easy access doors to add water and charcoal without opening cooking door. Contains 3 adjustable chrome cooking grates, heavy duty side carrying handles, and porcelain coated water pan.
Price: $129.84
List Price: $257.49 

Prago 30-Inch Outdoor Propane Vertical Smoker
Prago's 30 Inch Outdoor Propane Vertical Smoker has rotary igniter for easy start-up and fully adjustable propane fuel delivery system. External temperature gauge accurately displays the internal temperature of the smoker. Includes a cast iron wood chips/smoking box, and a fully welded, heavy gauge, black-coated steel cooking cabinet.
Price: $172.32
List Price: $239.99 

Outdoor Leisure 34168G Smoke Hollow Propane-Gas Smoker Outdoor Leisure 34168G Smoke Hollow Propane-Gas Smoker
The Smoke Hollow is packed with plenty of versatile features for smoking a wide variety of fare with ease. Multiple adjustment levels let you smoke slowly for days or turn up the heat to quickly marbleize side dishes and entrées. A cast brass burner stands up to high temperatures and long cooks. And, the smoker's porcelain-coated wood chip box resists scorching and corrosion even under extreme heat from Pecan, Hickory, White Oak, Apple, Alder and Mesquite woodchips. The water pan is also porcelain-coated to defy corrosion through years of use and fore easy cleaning. The door's magnetic latching system prevents leaks, trapping heat at a consistent level for quality smoked foods. Fitting nicely into patio corners, campers, and even car trunks for hauling to the family reunion or tailgate party, the unit measures 34 by 16 by 14 inches. And, a push-button ignition system means easy starts every time. A solid temperature gauge offers accurate cooking temperatures for easy monitoring. Two deluxe side handles make transport to and from the beach, campground, truck, patio, or deck a breeze. Best of all, assembly is a snap with easy to follow instructions and clear labels on all parts.
Price: $219.99
List Price: $219.99 

Monday, August 16, 2010

BBQ Smoker Types Explained with Buying Guide for Each

For those of us wanting to get a BBQ Smoker, there are so many out there, it is virtually impossible to just walk into a store or pick one out online without doing a lot of research beforehand.  I am writing this to help eliminate as much of the work as possible and give you breakdowns of the various types of BBQ Smoker, how to use them, and some great suggestions of ones that you can even buy online by clicking on the links I provide for them.  How's that for some one stop shopping?  

Now, if you would like to learn how to create a smoker from your regular charcoal or gas grill and not have to spend the extra money on any of these BBQ smokers, then you might want to check out my Creating a BBQ Smoker from a Normal Charcoal or Gas Grill.


Offset Smokers

One of my deepest regrets when we moved back home from Ohio is that we left my offset smoker behind. With a 26 foot truck packed from wall to wall and top to bottom, there simply was no room for it.  That didn't make it any less painful.  I used that thing to smoke everything from brisket to pork butt to fish to vegetables.  Simply put, I loved that darn thing.  We had picked it up on sale from Meijer for well under half price, and it included a grill cover and cast iron smoker box.  It was the last one available and apparently was a discontinued model, but it worked perfectly fine for me all the times I used it.

Enough of my trip down memory lane.  Offset smokers are what most people think of when they think of a smoker.  Basically offset smokers contain 2 chambers separated by a sliding door or vent.  The main chamber is where the meats are place and can be used as a normal charcoal grill when not smoking.  The offset chamber is where it can be set up for use as a smoker, by placing your charcoals and soaked wood into the chamber, closing the lid and opening the vent or door.  The more the vent is opened, the smokier the main chamber will get.  The water pan can be placed anywhere inside the main chamber, as there is no direct heat at all within that chamber.

As much as I believe you can make a great BBQ smoker from a normal charcoal grill, offset smokers and many of the other smokers have a built in advantage over a grill.  By having different chambers for the smoke and the food, you can add more briquets or wood to the smoking chamber without having to open the main chamber where the food is cooking. This prevents any heat or humidity from escaping from the main chamber while adding fuel.  In addition, offset smokers have a much great ability to control temperature and smoke than a normal charcoal grill.

Personally my favorite type of smoker, possibly because of the fact that I had one for a long period of time, but mainly because they work exceptionally well.  As the most popular BBQ smoker setup, millions of people can't be wrong! I have a few of my favorite offset smokers below in case you are leaning towards going with this setup.

My Favorite Offset Smokers!

Char Broil Offset Smoker American Gourmet Deluxe Grill Char Broil Offset Smoker American Gourmet Deluxe Grill
The Char Broil American Gourmet Deluxe Offset Smoker represents a great option for the smoker enthusiast with the space to cook for large groups and get togethers. The offset fire box allows for classic indirect cooking thgough the transmission of smoke, flavor, and low heat, through the cooking chamber. The cooking chamber is covered by a 670 sq. in. porcelain wire cooking grate and 355 sq. in chrome wire swingaway rack. There is a simple door for easy ash removal as well as a convenient front shelf.
Price: $169.99
List Price: $169.99
Brinkmann 805-2101-S Pitmaster Deluxe Smoke 'N Pit Brinkmann 805-2101-S Pitmaster Deluxe Smoke 'N Pit
Built for long-lasting durability, the Smoke ‘N Pit is constructed from heavy-gauge steel with tubular legs, a welded body, and a rust-resistant finish. With over 750 square inches of cooking area between the two chambers, it holds 100 pounds of food and 10 pounds of fuel in the firebox. A damper on the smokestack and an adjustable firebox air vent give you precise control over heat, smoke, and circulation. The unit comes with porcelain-coated, adjustable grates that fit both chambers and are easy to clean. Brinkmann also includes sturdy, heat-resistant wooden handles, a large wooden shelf for platters and utensils, and a recipe book for smoke cooking. A metal rack below adds stability and provides a place to stash wood and briquettes.
Price: $269.99
List Price: $250.00
Landmann 590135 Black Dog 42XT BBQ Charcoal Grill and Smoker, 506-Square Inch, Black Landmann 590135 Black Dog 42XT BBQ Charcoal Grill and Smoker, 506-Square Inch, Black
When nothing but the biggest and best will do! The Landman Black Dog 42 provides 761 square inches of cooking surface between both chambers, including a huge 506 square inches in the main chamber. Has a full 12 inches of range for the grill adjustment, and a removable ash tray for easy clean up. Large doors allow for easy access to smoking and cooking chambers. When you have the attitude of "Go Big or Go Home!", this is the smoker for you!
Price: $591.98
List Price: $591.98

Bullet BBQ Smokers

Wonder why its called a bullet smoker?

Bullet BBQ smokers are also known as Vertical Water Smokers because a pan of water sits between the heat source at the bottom of the "bullet", and the food at the middle and top of the "bullet".   They could easily be confused for a trash can by the lesser informed.  Don't make that mistake. Oscar could never make the kind of barbecue you can make in this BBQ smoker! In addition, there is something called the "Minion method" used with these types of BBQ smokers that can just about put you on autopilot over a long cooking session.  I will discuss the "Minion method" in greater detail below.  In addition, bullet BBQ smokers allow you to not have to soak wood chunks in water before cooking because they are able to maintain their temperatures well for a long period of time. 

There are four types of Bullet BBQ smokers: gas, electric, charcoal and wood. We will explore each of these types in greater detail below.

Wood Burning Bullet BBQ Smoker:

Traditionalists will point to the wood burning bullet BBQ smoker as being the original and best.  However, just because something came first, doesn't mean its the best.  After all, if this held true, we would all still be driving Model T's and using personal computers that took up an entire house that were 1/1000th as powerful as a laptop is today.  

One thing that is clear to many people is that the best smokiness flavor you can get is through an all wood smoker. This means instead of using charcoal for the heat and only pieces or chunks of wood for the smoke, you use the wood to create both heat and smoke.  This type of BBQ smoker takes a lot of practice to get right, both for keeping a constant temperature and for getting the right amount of smoke. You need to make sure the wood burns clean and that you don't oversmoke the meats, which will leave a bitter taste.  

Charcoal Burning Bullet BBQ Smoker:

Charcoal versions of this BBQ smoker are affordable and provide great flavor as well, although most will agree not quite as much as an all wood smoker. As with a charcoal grill, you will need to monitor the temperature throughout the cooking process and make adjustments or add charcoal to it to maintain the temperature you want.   

There is, however, a method created by a man name Jim Minion using one of these type of BBQ smokers, that can give you exceptional temperature control and long cooking times, and could be ideal for those wanting to cook overnight but not stay up all night, or even for those people that want to get that great slow-smoked flavor, but not spend all day doing it.  Of course, you are now asking, "What the heck is the Minion Method, and how do I use it?" Easy there young grasshopper.  I am going to tell you, just please stay calm.   

The Minion Method consists of lighting a set amount of charcoal in a chimney, which can depend on many things including temperature outside, precipitation, and wind speed.  20 charcoal briquets are good for warm, sunny days, 20-40 briquets recommended for cool days or days that are windy or rainy, and 40-60 briquets are recommended for cold days.  Take the remainder of the full bag of charcoal, and dump it into the bullet BBQ smoker.  Once the charcoal is ready to be dumped from the chimney, dump it onto the unlit charcoal that you just put in there.  Fill the pan with water, put your meats in there, and set your bottom vents to control the temperature. The unlit charcoals gradually become lit by the charcoals on top and help maintain a constant temperature, which can create burn times up to 18 hours with little or no user interaction. If the temperature starts to drop, just tap on the base of the BBQ smoker and it will help dislodge any ashes covering the lit coals and provide more heat. 

This is ideal for those who are planning on cooking for more than 6 hours, and this method does not have any ill effects on the taste or smokiness of the finished product, although many snooty old-timers turn up their noses on anyone adding anything to their BBQ smoker other than fully lit charcoal briquets. The fact that this technique is used by many competition winners apparently goes unnoticed by them.  

Gas Burning BBQ Smoker: 
A gas burning BBQ Smoker is something like a store bought Mix CD playing at a party instead of a DJ.  It sounds pretty good, but it just isn't the same.  Same thing with a gas burning BBQ Smoker.  It's portable, easy to use, and can travel with you no matter where you go.  All you have to do is make sure you don't run out of gas before the food is finished.  You are able to simply set the temperature right where you want it and basically leave it alone until the meat is done. Wood chips are added to the BBQ smoker pan and you are able to open the access door if you need to add additional wood ships or chunks. 

Electric BBQ Smoker: 
An electric BBQ Smoker relies on no fuel source, instead relying on the old power cord.  It can be used anywhere there is an electric outlet. Wood chips or chunks are placed near the heating element for smoke.  Some units have exact temperature controls, but others do not.  That really is not overly important, since you should have a good thermometer to use anyway.  Probably the easiest of all the Bullet BBQ Smoker models to use, it is pretty hard to screw up using these, but personally, the meat doesn't taste as well as using a charcoal or wood based BBQ smoker.

Wednesday, August 11, 2010

What Type of Wood For Smoking Should I Be Using?

There are quite a few different woods that can be used to give great flavor to foods by smoking.  What type of wood you should use depends on a few things.  First, it depends on your individual taste.  90% of people love the taste of brisket smoked with mesquite wood, but there are 10% that can't stand it.  Obviously if you are one of these 10%, no matter how many other people like the flavor mesquite gives, you will not. Secondly, it depends on what type of meat or fish you are planning to smoke. Not all wood flavors go with all meats.  Smoking pork butt with mesquite would be like drinking white wine with beef.  Yes, you can do it, and while not completely disgusting, it just doesn't taste as good as hickory does with pork, or red wine does with beef.  Lastly, it depends on what part of the country you are from.  or example, people in the Carolinas almost always use hickory to smoke with. Why?  Its naturally abundant in the area they live in.  Same thing with people in Texas.  They usually use mesquite.  Why?  Well, you can walk outside pretty much anywhere in Texas and find a mesquite bush within a few minutes.

For people who are not in a barbecue hotbed, like myself, we have no such predisposition to any certain type of wood.  Neither hickory nor mesquite is abundant here. We have maple, elm and lindenwood in abundance, with lindenwood being found in front of nearly every house in the city.  If you have never smelled a lindenwood tree when it is in full bloom around late May or early June, you have no idea what you are missing.  It smells so good, it is like you are in heaven smelling it.  But I digress.  I am pretty sure you are not reading this because you want to hear about the wonderful smell of lindenwood blossoms(do yourself a favor, put "smelling a lindenwood tree in full bloom" on your bucket list...trust me on this one...). 

Back to the topic at hand.  Unfortunately for me, none of these woods is particularly useful as a smoking wood, other than maple, but I have never heard of anyone around here actually using it(other than for smoking deli ham).  This would have been a huge problem if I had grown up as recently as 40 years ago. Luckily for us, we live in the 21st century where we can get virtually anything we could possibly want with an internet connection and about 7 days worth of time or less.

What follows is a list of useful woods for smoking, a little background on it, its best uses and a description of the wood.  I also will provide a useful link for anyone wanting to get this type of wood, so you don't have to search all over the internet for it.

HICKORY:

Hickory has the best combination of denseness, strength, hardness, and stiffness of any commercial wood. It can be used for many things, such as tool handles, bows, carts, drumsticks, and also pellets for wood burning stoves, as it has a very high energy content. Hickory grows abundantly across the Southeastern United States, and as such is the favorite smoking wood of most people in that region.  Pork, ham and beef are often smoked with hickory.  Hickory tends to give foods a rich, faintly sweet flavor.


MESQUITE:

Mesquite is a very hard wood that usually grows as a shrub throughout most of its native range.  Also known as "Texas Ironwood" due to the issues chainsaws have cutting it.  As a firewood, mesquite burns slowly and very hot.  It also has a very strong flavor to it and can relatively easily oversmoke the meat, leaving a bitter taste behind. Rookies should be very careful when using mesquite as you can ruin all your hard work by using too much.  Its also very important for those who live in an area where mesquite grows naturally to only use dried mesquite wood,  as the dryer it is, the less bitter flavor it has. Mesquite give a strong, smoky flavor to the food being smoked, and it is very important to not overuse it.


APPLE:
Apple trees are very common in this area, but I have never attempted to smoke foods with it.  It has a very thin bark, and gives off less smoke than most other woods, so you will need more of it.  The smoke gives off a very nice, aromatic and fruity flavor, surprisingly similar to that of an apple(you don't say!).  Its best used to smoke poultry and pork, and usually is used in conjunction with other woods to add in some extra flavor, rather than by itself.  Hickory and apple wood is a fairly common combination when smoking pork butts, and it also is used with mesquite to smoke ribs by some.  The light apple wood flavor offsets the strong smoky flavor of the mesquite. 


ALDER:

Alder wood has been used for thousands of years by Native Americans to treat poison oak, insect bites, and skin irritations.  Natives of the Blackfeet tribe also use it to treat lymphatic disorders and tuberculosis.  It has been recently found that Alder contains natural compounds that have been shown to be effective against a variety of tumors, and that its bark contains a substance that acts as an anti-inflammatory, which is transformed into salicylic acid(aspirin) when ingested by humans.  It is commonly found throughout the Northern United States and Europe, and is most popularly used in electric guitars, as it provides a bright tone to the instrument. It is a very delicate wood that gives slight hint of sweetness to the meat, and is best used with pork, fish, poultry, and game birds, such as pheasants and quail. Alder is most commonly used for smoking in European nations.


CHERRY:

Cherry wood produces a mild , fruity flavor to the meats, as well as having a tendency to turn the meats a rich mahogany color.  It is fairly common in many places throughout the world, including the United States.  Not all types of cherry wood are good for smoking however, as some contain fairly high amounts of cyanide.  It is most popularly used with beef and pork, and like apple, is usually used in conjunction with other woods to balance out the flavor.  Most commonly paired with alder, hickory, pecan or oak.


MAPLE:

Maple trees are quite popular for a  few reasons, but usually they are not related to smoking foods.  Maple syrup is derived from the sugar maple, which is found in abundance in many Northern states.  Japanese maple trees are also very popular for landscaping uses, and I, in fact, have one in front of my house.  They also are responsible for a great color show every fall in many of the Northern states as well, as their leaves turn all shades of yellow, red and orange before falling off the trees, and creating many young boys swearing under their breath as they are told to go outside with a rake and clean up the mess they make!  Maple gives a flavor quite similar to that of alder wood.  It gives a sweet flavor, and also causes the meats to darken in color.  Normally is used in conjunction with other woods such as alder, apple or oak.  Sugar maple is the sweetest of all the maples, and is commonly used to smoke hams, but can be used with pork as well.


WHITE OAK:

White Oak is a very heavy and hard wood that is highly desired for furniture and it is also commonly used to age wine, whiskey, and various other liquors in casks. It is commonly found in the Eastern United States, and throughout Europe and Japan as well.   White Oak trees do not grow very high, but they can grow as wide as they are tall, and are considered great shade trees.  White oak burns for a long time and gives off a lot of smoke, penetrating meats deeply.  It is the most commonly used wood to smoke meats with commercially. Great with sausages, and combined with cherry wood for use on turkey.  Also works good with beef and pork. 


RED OAK:.

Red Oak grows straight and tall and is most commonly found in the Northeastern United States and north into Canada, although it does range west to the Mississippi River and south to Georgia. California also has a species of red oak that grows to tremendous heights and widths. It is one of the most highly prized woods for timber production and is used in many building related products.  Red Oak is an open wood that you can literally blow smoke through from one end to the other.  It is not as popular as White Oak, but gives a sweeter flavor to the meats.  Most commonly used as a smoking wood in California.


PECAN:

Pecan is in the hickory family, and is becoming more and more popular for smoking meats.  It is not a wood that you want to use by itself, as it will impart a flavor that is very pungent. It is more commonly used in conjunction with other fruitwoods such as apple, cherry, and plum. Pecans are a native tree to the United States and range from New Mexico to South Carolina, and as far north as Southern Illinois.  Pecan shells can also be used in smoking to impart a similar flavor, instead of pecan wood. Be advised to use sparingly, however, and never by themselves. It goes well with a wide variety of meats including beef, pork and poultry.


These are some of the more common smoking woods in use, but certainly not all of them by any stretch of the imagination.  There are virtually an endless amount of woods that can be used in smoking meats and the only real way to know whether you will like any particular wood is to try it!  This is only meant to be used as a guide to help figure out what woods you might like and what meats they go best with.  Don't be afraid to experiment, but don't blame me if you end up with a piece of meat you cooked for 10 hours that has to be thrown out!

As always, stay smoky my friends!

Tuesday, August 10, 2010

Great Sides to go with Brisket!

OK,  you have your brisket perfectly cooked and ready to melt in your mouth.  Then you look down on your plate and see nothing else on it.  That's not good.  Luckily for you, there are several easy to make side dishes that go great with brisket!  I personally love red beans and rice, but some other great sides include creamy coleslaw, cowboy beans, and new potato salad.  I am getting hungry just thinking about it!


RED BEANS AND RICE:


red beans & rice Pictures, Images and Photos

A Texas staple!  Much like brisket, the key to making this is "low and slow", except this is made on a stovetop and not on a grill.  To get all the flavors blended together perfectly, and to have it the right consistency, you are going to need to devote about 5 hours of your day to this recipe.  This makes it great for brisket, since you can start making it while the brisket is still smoking.  You are going to want to get dry beans in a bag, not canned beans. Using canned beans instead of dry beans will have a large negative effect on your red beans and rice, so don't do it.  Here is the recipe:


Ingredients:


1.5 cups dried red or pinto beans
6 cups water
3 carrots, grated
3 medium onions, chopped
8 strips of bacon, diced
5 cups chicken stock(I substitute beef stock)*
dash of garlic salt
1.5 teaspoons ground cumin
1 bay leaf
1 cup uncooked white rice (do not use instant rice--should not have to type that, but I do anyways)
 *Perfectly OK to substitute bullion for liquid stock, since adding bullion to water creates stock.


Directions:


1) Rinse and check over beans, throwing out any of the beans that don't pass your muster.  Combine beans and water in a large pot, bringing to boil for 45 minutes.  After done cooking, drain.


2) In a separate pan or skillet, saute bacon, carrots, and onion until it becomes softened and translucent, but not so much as to brown it.


3) Take drained beans and skillet mixture, and add the chicken or beef stock to it.  Set timer for 15 minutes and cook over medium heat.  Take spice mixture, stir in, put lid on, and turn down heat to a simmer for about 2 hours or until the beans have gotten soft. 


4) Add rice, and if need be, more chicken or beef stock.  Continue to simmer for 1 more hour.  Salt as needed.


This goes so well with smoked brisket, I would have to say this is my "unofficial" side dish that I always serve.  In fact, it is so good, this recipe won a Blue Ribbon at the Texas State Fair!


COWBOY BEANS:

Meal from Cowboy Cuisine Southern BBQ Pictures, Images and Photos

In Texas, no matter what type of beans the recipe calls for, there, in parenthesis, next to that bean are the words "or pinto beans".  Pinto beans, if they are not already, should be the state bean of Texas.  Here is a recipe for something called Cowboy Beans, which makes use of the "burnt ends" of the brisket to add some great flavor to the beans.  Again, this is a great recipe to go with brisket, as the preparation time is about 3 hours.  It will give you plenty of time to make these!

Ingredients:


1 pound dried pinto beans(1 16 ounce bag)
8 cups water
2 cups brisket burnt ends, chopped
1 14 ounce can whole tomatoes
1 large onion, chopped
1 cup barbecue sauce(the Texas Mop Sauce works great!)
6 cloves garlic, minced
3 jalapeno peppers, seeded and chopped
1 tablespoon chili powder
1 tablespoon Worcestershire sauce


Directions:


1) Wash and rinse beans and pour into large pan. 

2) Toss in everything else but the salt, including the kitchen sink(no, just kidding!)  

3) Stir gently while bringing to a boil. Lower heat, cover with lid and simmer for two hours. 

4) Stir occasionally, making sure to lift up beans from the bottom to prevent sticking. 

5) Add salt after 1 hour. 

Beans are cooked when they are soft to the touch, but still hold their shape.   


SOUTHERN STYLE CREAMY COLESLAW:

coleslaw Pictures, Images and Photos

This coleslaw recipe is so good, I could almost skip the meat and just get a big plate of the coleslaw to eat.  Personally I like to add a little bit more mayonnaise than what the recipe calls for, but that is up to your personal taste.  This makes roughly 8 servings, so just double or triple the recipe if cooking for large groups.

Ingredients for dressing:

1 tablespoon distilled vinegar(white vinegar, not cider!)
1/2 cup mayonnaise(I like using Olive Oil mayonnaise and probably put about 2/3 of a cup in)
1 tablespoon white sugar
1/4 teaspoon salt
1/4 teaspoon ground black pepper
1/2 teaspoon celery seeds(NOT celery salt--personally, I don't add celery seeds)

Ingredients for the slaw:

1/2 head green cabbage
1/2 head red cabbage
1 large carrot, peeled
1/2 small white onion
Optional: 1/2 red or green bell pepper, thinly sliced
Optional: 3 radishes, thinly sliced
Optional: 1 small minced jalapeno if you like it hot, or add some chipotle powder.

Directions:


1) Either slice, chop or food process both heads of cabbage, carrot, onion and any of the optional ingredients together.  

2) Mix in dressing well with clean hands, and refrigerate for at least one hour. 


TEXAS NEW POTATO SALAD:

Potato Salad Pictures, Images and Photos

A mustardy potato salad that goes tremendously well with brisket.  In some ways pretty similar to a German potato salad, but in other ways slightly different.  Anyone who loves mustard will definitely love this potato salad, and probably many people who don't particularly like mustard might become new converts! 

Ingredients:


2 pounds of red new potatoes, diced and cubed but unpeeled
2 celery stalks, diced
2 green onions, sliced(aka scallions in some parts of the country)
1/4 cup of apple cider vinegar
1/4 cup of bread and butter pickles, diced(can use bread and butter jalapenos for extra kick)
1/4 cup of yellow mustard
1/4 cup of mayonnaise
1/2 teaspoon paprika
1 teaspoon bread and butter pickle juice(or jalapeno pickle juice)
Salt and black pepper to taste

Optional: Hot sauce to taste(it goes with everything remember??)


Directions:

1) Put potatoes and cover with water in a large pot.  Bring to a boil ,and cook until tender, or about 15 minutes. You want them to be tender, but not mushy.


2) Drain and rinse potatoes in cold water.  Mix in vinegar and salt, and let cool in the fridge for 30 minutes.

3) Once the potatoes have cooled, stir in the mustard and mayonnaise gently, and then toss in the remaining ingredients.

Serves four to six.


Notes: Some people add dill pickles and sliced eggs to the salad, and this comes out pretty good as well. Potatoes are unpeeled, but can peel them if you don't like the skins. Can substitute red potatoes with any other type of potato, if desired. 


Well, there you have it. Four mouth watering and delicious sides that go with and enhance the brisket experience for you and your guests! Make them all, or just make one or two. It is completely at your discretion. Just remember, whatever you do to stay smoky my friend!

Wanting to learn how to create beef brisket from start to finish? Check out my Brisket Smoking article!


Monday, August 9, 2010

Cooking Brisket to Perfection! How to smoke a brisket

If you are joining me from squidoo, hubpages, goarticles, ezinearticles, twitter, or any of the other sites you might be coming from, I say thank you!  And if you are coming here just out of the blue or from another site's link, I say welcome as well although you are stepping into this at the halfway point!  Click HERE to go check out the beginning of the article before continuing at this site!


OK, I left off making sure you got certain items in your possession before we could cook the brisket the following morning. Well, you aren't off the hook yet! We still have some final preparations before going to bed if you want to be all that you can be! Get a large bowl, or put a stopper in your kitchen sink to prevent water from draining. Fill the large bowl or sink with water. Take several handfuls of mesquite chips, or a lesser amount of mesquite chunks(maybe 2 handfuls tops), and plop them in the water to soak overnight. Why? Well, for two reasons. The first is because mesquite burns very hotly, which will cause the temperatures in your grill to go up too high. The second is because you will not get a good amount of smoke if the wood is dry. Just stop asking questions, and soak the wood already! Trust me, I wouldn't steer you wrong! 


SETTING UP THE GRILL

For those of you without a smoker, don't despair!  I am going to teach you how to take a normal charcoal grill and turn it into a great smoker!  Probably not quite as good as a smoker designed specifically for smoking, but a very good one nonetheless!  Before I teach you how to do that, I need to give you a little background on how we are going to be cooking the brisket, and how it differs from normal grilling you would do with a steak, a hamburger, or a piece of chicken. 

Direct vs. Indirect Heat

When most people think of grilling or barbecuing, they think of cooking hot dogs, hamburgers, steaks and chicken on the grill.  They are correct, but only partially.  hen you cook this way, you want high temperatures for short durations of time.  The meat is cooked relatively quickly and at high temperatures(350 degrees F or higher, usually 400-500 F) with direct heat.  What is direct heat, you might ask?  Well direct heat is putting the source of the heat, in this case the charcoals, directly under the food and using this heat to cook the food.  This is called grilling.

Indirect heat, is what we are going to be using.  Yes, we are using charcoal just like when we cook with direct heat, but we are going to let the air do the cooking, not the charcoal.  Our grill will become more like a convection oven than a true grill, as the heat source is not cooking the food directly, but rather heating up the surrounding air, which is doing the actual cooking. This is why it is termed indirect heat.With indirect heat, the goal is "low and slow".  Too high, and the meat becomes dried out, and too low, and the meat never cooks or you are eating dinner after its dark out at 11pm, and everyone is gone after you had to order pizza to feed them.

Indirect heat is also called "low and slow" cooking.  Temperatures are much lower than normal grilling, usually in the 225 - 275 degree F range, and the meat is cooked for a much longer time.  How long you ask?  Well, that all depends on many variables.  What variables? Well, how constant the temperature is, how good you are at keeping it within that range, how many pounds of meat you are cooking, etc.  A rule of thumb with brisket is that it takes an 1 hour and 15 minutes per pound, although many times, it really has been about an hour per pound, but the hour and 15 minute rule of thumb is good because then you will give yourself enough time. 

Now I am going to teach you how to set up your normal charcoal grill to use indirect heat.  The only thing you need to make absolutely sure your grill has is a cover.  Without a cover, you are going to be losing heat, smoke, humidity and going through lots of charcoal.  It is just not practical to do so.  If you need to get a grill with a lid,  would recommend the Weber grill pictured down below:


However, if you are stubborn, and demand a smoker, then here is a Weber smoker, which is one of the best and most respected names in barbecue:


Grill Setup Instructions

It's probably around 6:30AM as you are waking up with the alarm going off, and as soon as you do, take the brisket out of the refrigerator and let it warm up a little bit before cooking.  Cold meats take longer to cook than room temperature ones, but just make sure you are not going to be leaving it out for a period of hours, when it can develop food borne pathogens like bacteria that can cause problems.

Take one of the aluminum pans and place it in he bottom of the grill on the right hand side.  Bring out some water and fill the pan(easier than carrying a full pan of water and spilling half of it!).  This will help keep the brisket moist and tender. Take the other aluminum pan, and put it directly in the center of the grilling surface.  This will catch the delicious juices coming from the brisket that you can use to add to the brisket sauce or to baste it in its juices.  Next, get your charcoal chimney and put about 20 coals in it.  Stuff the bottom with two pieces of newspaper, set it on the grill or the ground(concrete, not grass, as it WILL burn), and light it. 

After about 15-20 minutes, the coals in the coals in the chimney will be ashed over and you can dump it into the grill and start cooking.  In the meantime, if you have mesquite chips, get out some aluminum foil, take a handful of wood chips from your sink or bowl, and place it on the foil.  Cover the chips completely by folding over the foil, and poke holes in the top of the foil with a fork or knife.  This will allow the smoke to escape and will prevent a messy cleanup.  You can create more foil pouches if you want while you are waiting for the coals to be ready.

Take your thermometer out and your cork.  Run the metal probe through the middle of the cork lengthwise. Set aside temporarily until we have everything else ready.

Check the coals.  If they are ready(grey and ashed over for the most part), dump them into the LEFT side of the grill only!  Remember, indirect heat.  We are going to make a nice layer of coals to spread out the heat.  Make sure the coals stretch from front to back.  Reposition them if you need to.  Take your foil pouch of mesquite wood and toss it onto the coals.  Within about 30 seconds or less, you should begin seeing and smelling the smoke coming out of the pouches.  Take the brisket and put it directly in the middle of the grill, in between the coals and the water pan, and directly above the drip pan. Take your corked thermometer, and place it directly next to the brisket, but making sure it is not touching the brisket.  Now, CLOSE THE GRILL. If you have a bottom vent, make sure it is fully open for now.  If there is no bottom vent, like the grill I have, pull out the ash catcher under the grill to allow some air to get in.

Check the temperature on the thermometer. It should slowly rise and hopefully stop in the 225-250 degree F range.  Brisket needs to be cooked at a lower temperature than pork does, as it is more unforgiving and will dry out quicker than a pork butt.  If the temperature stays steady between those two readings, then you my friend have earned a few hours of free time!  With the lid closed, the temperature should stay pretty stable for a few hours, if not longer.  Your free time isn't free yet, however!  Now its time to make the barbecue mop and finishing sauce!

GET YOUR MOPS OUT

I am sure you are wondering what a mop is. No, it is not something you use to clean the floor, at least not in this context.  A mop is a sauce you use to brush or mop onto the brisket while it is cooking to enhance flavor and keep it moist.  I recommend you have a good silicon brush as it holds lots of sauce and is easy to clean.
A good basting brush is listed below if you are confused as to where to get one, or if you want a very good one instead of a cheaper one:


Now, onto the actual making of the mop.  I am going to list the ingredients, and you may need to run to the local supermarket. That's OK. It will give you something to do instead of constantly disrupting the brisket smoking by repeatedly opening the grill to check on it.  I know, you can't help it.  I did the same thing as a newbie to brisket smoking.  This i why I am going to be sending you on a shopping mission.  To save you from yourself. 

Ingredients

1 tablespoon paprika
2 teaspoons black pepper
2 teaspoons chili powder
1 teaspoon cumin powder
1 tablespoon of butter *
1 medium onion, finely chopped
4 cloves garlic, minced or pressed
1 green bell pepper, chopped
1 cup Yuengling Lager (or any other lager). Get some for yourself too!
1/4 cup ketchup
1/4 cup apple cider vinegar
3 tablespoons Worcestershire sauce
3 tablespoons steak sauce
2 tablespoons brown sugar
Hot sauce to taste (start with 2 teaspoons of Tabasco sauce for mild heat)
2 cups beef, veal, or chicken stock(get bullion and make your own)
* Authentic recipe calls for rendered beef fat from the fatback of a brisket or bacon fat. However butter or margarine work just fine.

Instructions

1) Put  the paprika, black pepper, chili powder, and cumin in a small bowl and mix well.

2) In a one quart saucepan, melt the butter or bacon fat and slowly cook the onion over medium heat until translucent.

3) Add the garlic, bell pepper, and the spice mix you made in step (1). Stir, and cook for two minutes to extract the flavors.

4) Add the stock and the rest of the ingredients. Stir until well blended. Simmer on medium for 15 minutes. Leftovers will keep in the fridge for a month or so.  Yields approximately 5 cups of sauce.


Take a small bowl, and pour about a cup of sauce into it.  This will be your mopping sauce you will use for the brisket.  We separated it from the main sauce to prevent any cross contamination from dipping the brush in and out of the sauce and brushing the still uncooked brisket.  Right about now, you should be about 2 to 3 hours into your brisket adventure.  Time to go out take a look at the grill.

MOPPING THE BRISKET

Hopefully the temperature is still in the 225-250 degree F range as you check the thermometer(it should be as long as you didn't turn into "I gotta open the lid to check it out" guy).  If it is too cool, immediately toss some coals into your charcoal chimney and light it.  Put about 10-15 coals in, and wait about 10-15 minutes to ensure they are ashed over and not still burning.  If you need to add more coals, wait to mop your brisket until you add the coals in.  This way you only have to open the lid once instead of twice.  When you open the lid, do it quickly.  The longer it stays open, the more heat, humidity and smoke is being lost, which means the longer it will take to cook your brisket.

To add the coals, grab your tongs and grab the far side of the grill on the right and pull it out enough for you dump the coals in.  Obviously do not pull it out to far or you will dump your brisket on the ground.  If you need to, add another foil pouch or more mesquite chunks to the coals as well to ensure there is still a good supply of smoke. Its important to get all the smoke that you want the brisket to have within the first 4 or 5 hours, as it will not absorb anymore smoke after that time. 

Now its time to mop your brisket.  Dip your silicon brush into the brisket and get a good portion of sauce on it.  Brush the brisket, making sure it is well coated with sauce, but not dripping wet, either. When you are finished, close the grill back up and check the thermometer.  Again, you want it to be right in the 225-250 degree F range. If it gets too hot, get a spray bottle of water and spray the coals until it gets the temperature down to 250 F.


Keep the sauce and brush near the grill and cover it with aluminum foil to keep any unwanted flying creatures out.  Last thing you want is to have someone take a bite into the brisket and bite into a fly instead.  I like to mop the brisket once every hour and a half to two hours.  This way keeps it moist without having to open the lid too often.  Make sure you watch the temperature and get ready to add charcoal anytime you see the grill losing heat and dipping below 230 degrees F.  The idea is to have the charcoal ready to add before the temperature gets under 225 F, not once its sitting at 215 F. 

MAINTAINING THE TEMPERATURE

A key component of cooking brisket is proper temperature maintenance.  Unfortunately for many people, it is also one of the hardest to master, but it really isn't that difficult.  So then why is it so hard?  Because us guys have a natural tendency to want to check things out and to make sure everything is going OK.  Its sort of an ingrained behavior.  We are problem solvers.  We have to make sure everything is OK, or else we have to start solving problems and fixing things.  I know its hard, but don't be that guy.  Don't be that guy that opens up his grill every 15 minutes to check on the brisket and causes it to take an extra 3 hours to cook.  Just don't do it.  I mean it. 

If you are reading this and getting ready to open the grill, other than to mop the brisket every 90-120 minutes, STOP!  The brisket is cooking perfectly fine without you opening it.  In fact, it is cooking perfectly fine BECAUSE you aren't opening it.  I cannot state this enough. Opening the grill too often is a major cause of headaches among people who smoke brisket.  Take your hand off the lid and step away slowly.

By now, the brisket should be approaching 4 to 5 hours.  This is around the point where the meat will not absorb much smoke, so do not throw anymore foil pouches or mesquite chunks onto the coals.  Doing so will have no beneficial effects on the meat, and it may cause the meat to become oversmoked, which gives a somewhat bitter, nasty taste to the brisket. 

Some places will tell you to take out the brisket, wrap it in foil and finish cooking it in a normal oven.  I won't do that, not because that probably isn't a way of getting an acceptable brisket, but because I like cooking it on a charcoal grill too much. Ovens are great if you are in the dead of winter and you don't feel like freezing outside while cooking brisket.  In the summer, the grill is it.

Get ready to mop the brisket again as needed around every 90-120 minutes.  Again, make sure not to overly saturate the meat with sauce, but get a nice layer on the top and sides.  No need to flip the brisket over, it is cooking on all sides equally because of the air doing the cooking, not the coals.

Depending on the size of the brisket, yours might almost be done at this point.  However, with a full brisket of about 10 lbs or more, you still have a few hours to go.


THE "TEXAS CRUTCH"

A little trick that most of the competitive barbecue teams use is something known as the "Texas Crutch".  Basically this entails wrapping the brisket in double foil, adding some sauce or liquid to the foil(more beer works well), and then completely covering the brisket with the foil, sealing it up.  Do this about an hour before the brisket is finished cooking, or roughly when the temperature reaches 185 degrees F(takes about an hour for the temp to go up 10 degrees).  This creates more moisture and humidity, giving the brisket even more tenderness than normal.  Leave it on the grill for about an hour like this, and you will get an awesome result, I promise you!  Once the internal temperature reaches 195 degrees F, the brisket is ready to be taken off the grill.

However, you are not done yet.  Take the brisket still wrapped in foil and put it in a cooler or in an unheated oven.  We do this to let the brisket rest and to help the rendering process where all the connective tissues and fat basically melt, which creates the tenderness we are after.  You will want to leave it resting for at least an hour.  Once the hour is up, take the brisket out of the oven and get ready for the grand finale!


CUTTING AND SERVING THE BRISKET


Get a large tray out and put it on a flat surface.  Place the brisket still wrapped in foil on top of it.  Before you go cutting it, I am going to give you a quick primer on brisket cutting.  Brisket has a "grain" to it.  The grain is the direction the meat is going and you always want to cut with the grain, not against it, which would lead to the meat not cutting properly.  You can quickly look at the meat and determine which way the grain is going.  Again, always cut with the grain.

Unwrap the brisket and get ready to cut it.  Make sure you have a deep tray! The first slice you make into the brisket is going to unleash an avalanche of juices that you would never have believed could come from a piece of cooked meat.  It will literally "gush" out and if the tray isn't deep enough it will gush all over you and the floor.  Just giving you fair warning. Cut the meat quickly, making sure to go with the grain, not against it. 

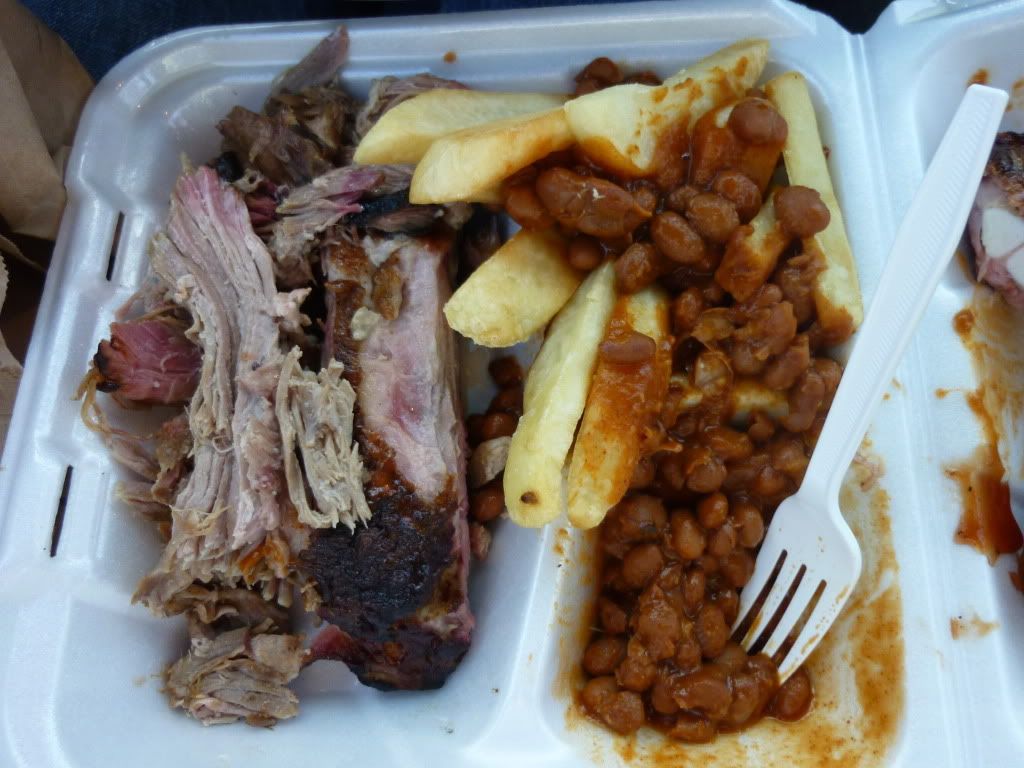
Brisket will dry out quickly if left in the open.  Slice an amount of meat that you need, and quickly cover the rest in juice and foil.  You can then serve the brisket on  sandwich bun, either in its sliced form, or as many do, chop it up into chopped brisket, and serve it that way.  Pile it up on the sandwich, drizzle some of the mop sauce you made previously that should still be sitting on the stove, and serve it. 

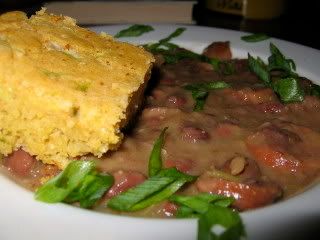
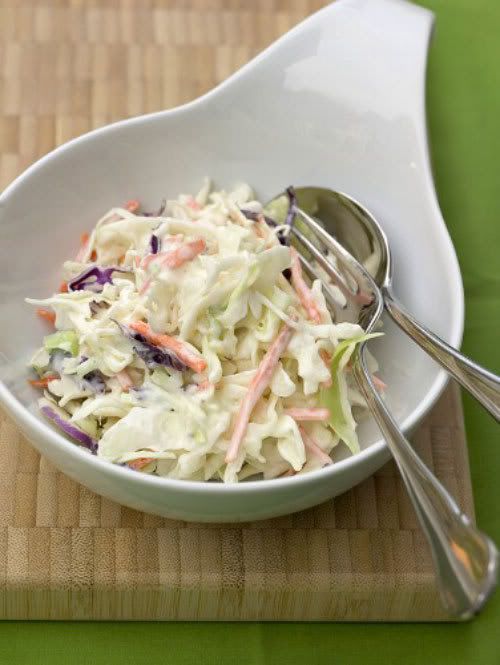
Goes great with creamy coleslaw, baked beans, or red beans and rice.  I will explore the recipes and instructions for making these sides in another blog at a later date.  Sit back, relax and enjoy watching the expressions on your friends faces as they take their first bite into their sandwich.  You may want to have your camera handy as a picture really is worth a thousand words!


Enter your email address:

Delivered by FeedBurner


All you need to know about barbecue

HTML Hit Counters


Free Web Counter